Prepare IDT-Manager
Start IDT-Manager on EC2 instance
-
Start EC2 instance with following setting.
-
AMI: (select IDT-Manager AMI at AWS Marketplace)
-
Instance type: over 4 core vCPU and over 8GB RAM. (m5.xlarge is recommended)
-
Storage: 50GB for a monitored instance generally. (See Installation Guide for more details)
-
/dev/sdb: online data
-
/dev/sdc: backup data
-
/dev/sdd: Insight Database Testing working area
-
-
Security group: ssh, http(7777, 7778)
-
PISO-TGT must be able to connect to port 7777 of IDT-Manager.
-
Port 7777 and 77778 are used for Web-UI.
-
-
-
Logon to the EC2 instance with 'centos' user.
Setup PISO-Manager
-
Set hostname. For '<HOSTNAME>', you can give it the name you want.
sudo hostnamectl set-hostname --static <HOSTNAME>-
Recognize expanded volume.
If you have expanded volume size, you must use file system–specific commands to extend the file system to the larger size.
sudo xfs_growfs -d /mnt/piso-data
sudo xfs_growfs -d /mnt/piso-backup
sudo xfs_growfs -d /mnt/idt-data-
Install
Select 'en' or 'y' for questions and input license information. For license info., input the provided license password phrase.
su piso
cd ~/piso-manager/
./install/install.sh

....

source ~/.bashrc
Start PISO-Manager
-
Start PISO-Manager.
su piso
istctl uppg
istctl upap
istctl startall-
Now you can access to PISO-Manager web UI. The URL is 'http://<IP_ADDRESS>:7777/piso/'.
The default username is 'administrator', and the default password is your EC2 instance id.
Setup IDT-Manager
-
Setup IDT-Manager
su insight
istlicense -c xxxx-xxxx-xxxx-xxxx-
Now you can access to IDT-Manager web UI. The URL is 'http://<IP_ADDRESS>:7778/'.
The default password is your EC2 instance id.
Configure PISO-TGT setting to point to the launched PISO-Manager.
Configure PISO-TGT
-
Stop PISO-TGT process
istctl downistcmon
istctl stopall-
Setup PISO-TGT to connect to PISO-Manager. Be sure that PISO-Manager’s securiy group is set up for connectted from PISO-TGT. (tcp/7777).
istctl setconfig-
Set PISO-Manager IP address
-
Select 'STEP 1 Setup ISM'
-
Set IP Address of PISO-Manager.
-
Set 'C' for LANG.
-
Leave other information.
-
-
Select 'STEP 4 Register ISM'
-
-
Start PISO-TGT.
istctl upistcmon
istctl startall-
Check PISO-TGT service status. (All processes must be runnging.)
istctl statusConfigure PISO SQL collection
-
Confiugre PISO SQL collection and alert setting at PISO-Manager Web-UI.
-
Follow PISO-Manager setting guide for details.
-
-
After the configuration, database activities on the target database will be monitored.
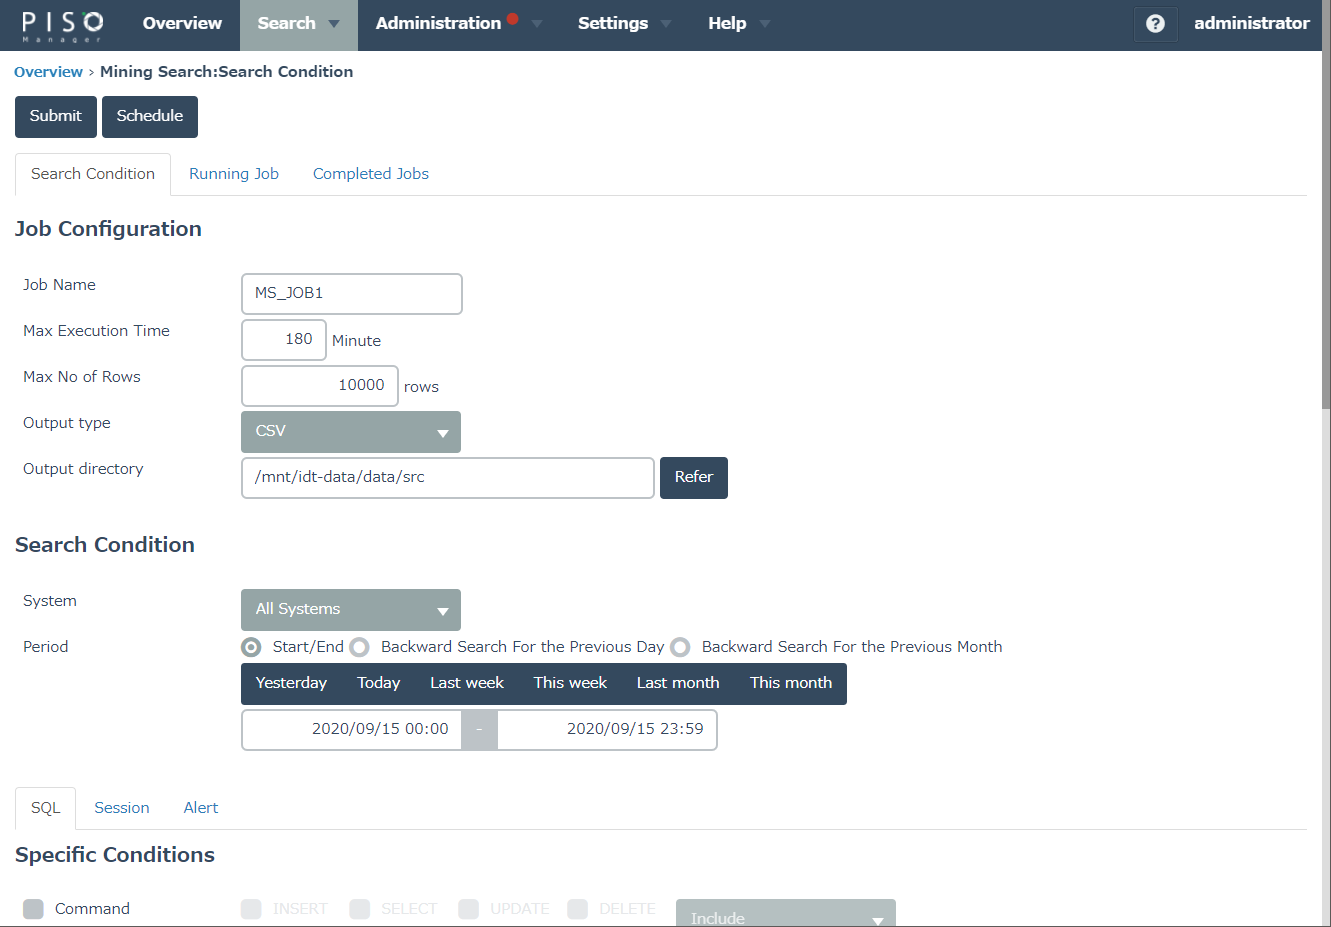
Output collected SQLs to a CSV file.
-
Select [Search]-[Mining Search].
-
Output collected SQLs to CSV file with following setting.
-
Otuput type: CSV
-
Output directory: /mnt/idt-data/data/src
-
keep [SQL] tab selected
-
-
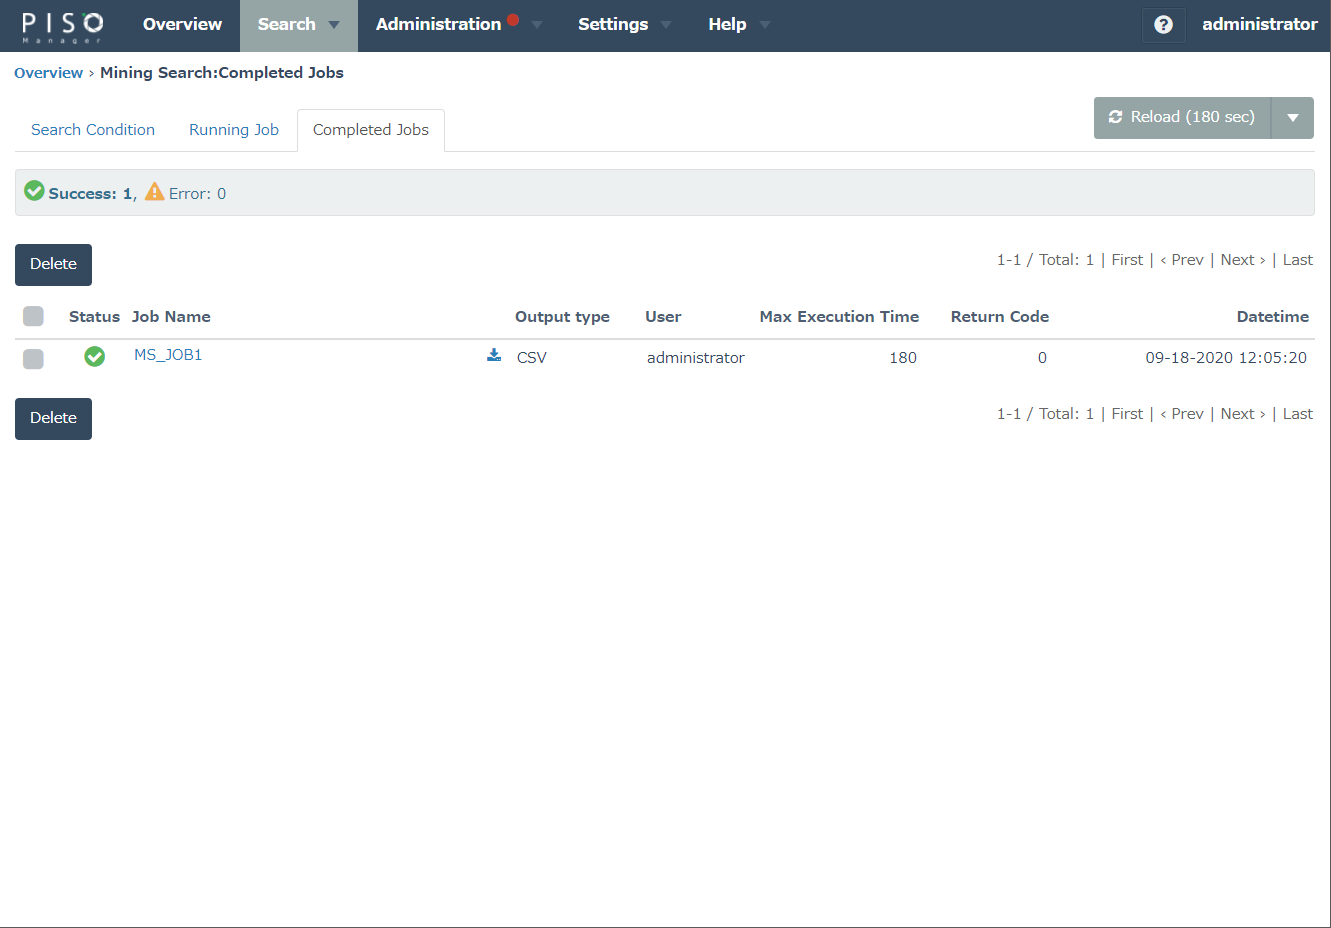
Select [Submit].
-
Confirm the job is submitted and finished on Runnning Job and Completed Jobs Tab.
SQL Evaluation (on Insight Database Testing Web UI)
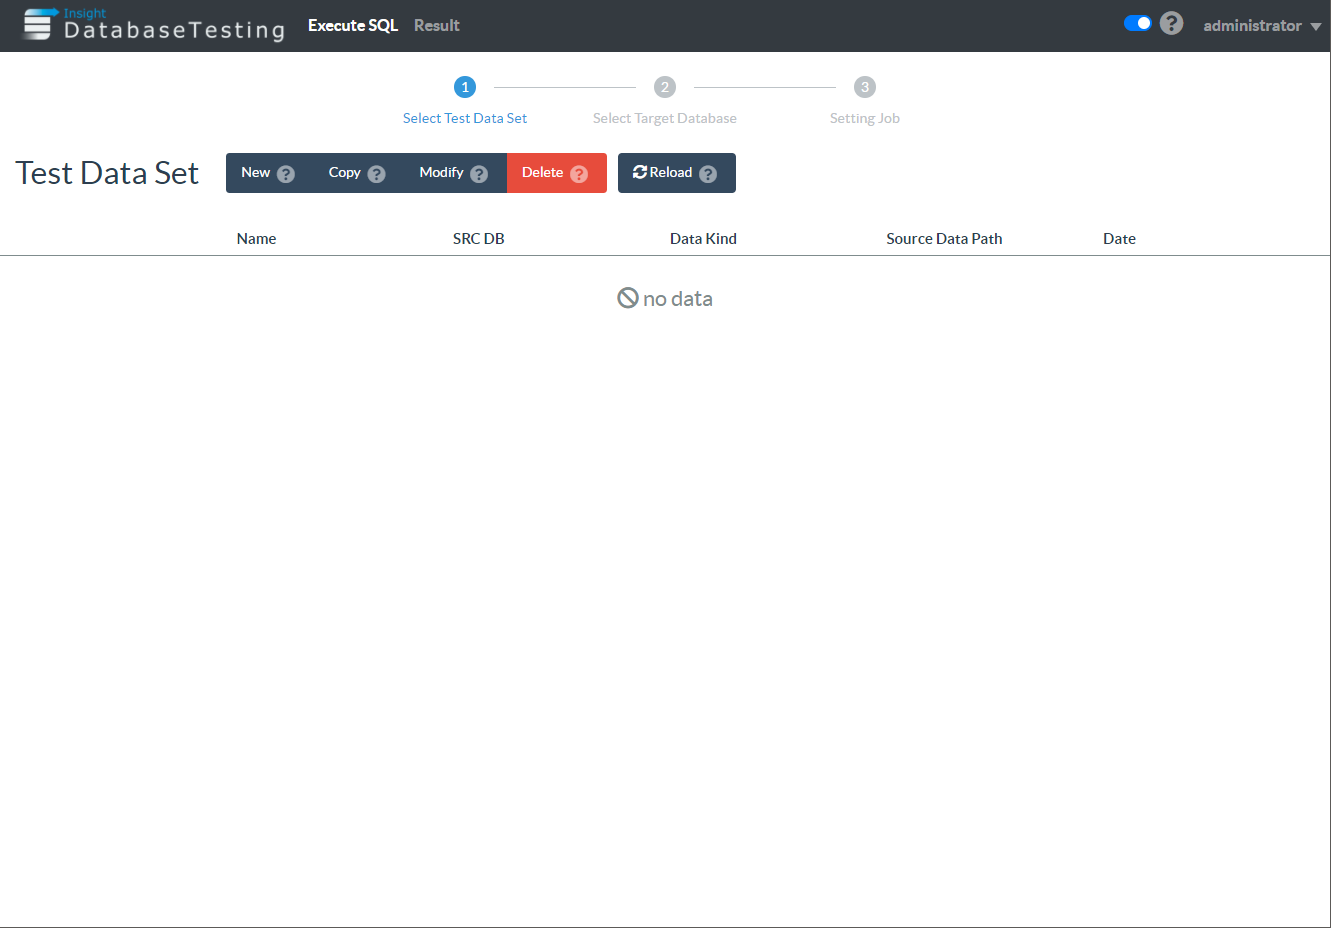
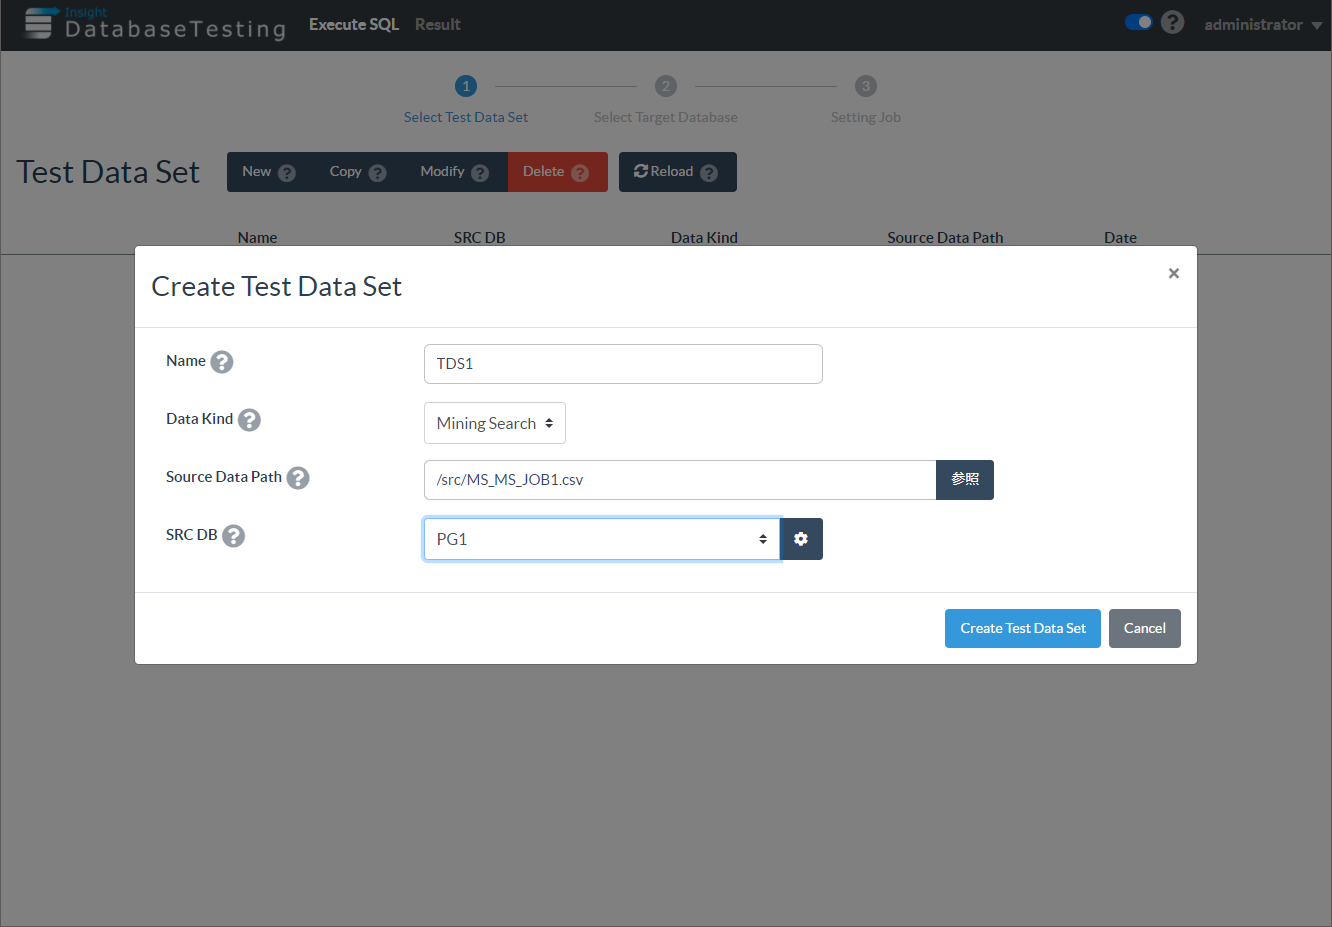
Create Test Data Set
Prepare 'Test Data Set' for SQL evaluation.
-
Select 'New' from Test Data Set list.
-
Set following info.
-
Name: name of 'Test Data Set'
-
Data Kind: 'Mining Search'
-
Source Data Path: select output csv file from /src.
-
SRC DB: set source database info at following window.
-

-
Select [Create Test Data Set].
-
Select created Test Data Set from the list. (Click the name.)
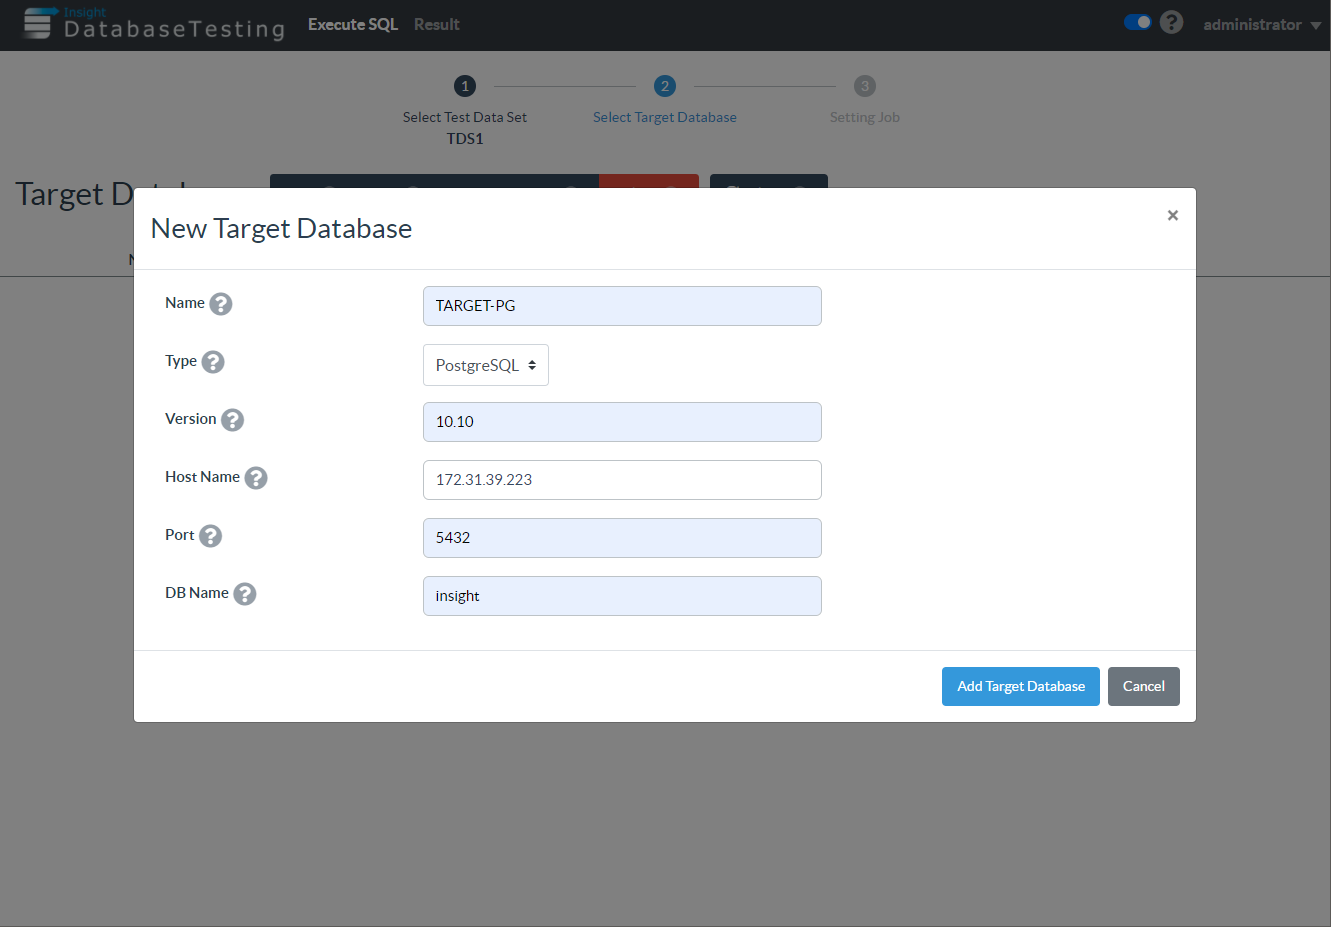
Set Target Database
-
Select [New].
-
Set following target database info.
-
Name: name of target database
-
Type: PostgreSQL or Oracle
-
Version: (database version string)
-
Host Name: IP address of target database (Use IP address of PISO-TGT for the test.)
-
Port: port No. of the database server
-
DB Name: database name
-
-
Select [Add Target Database].
-
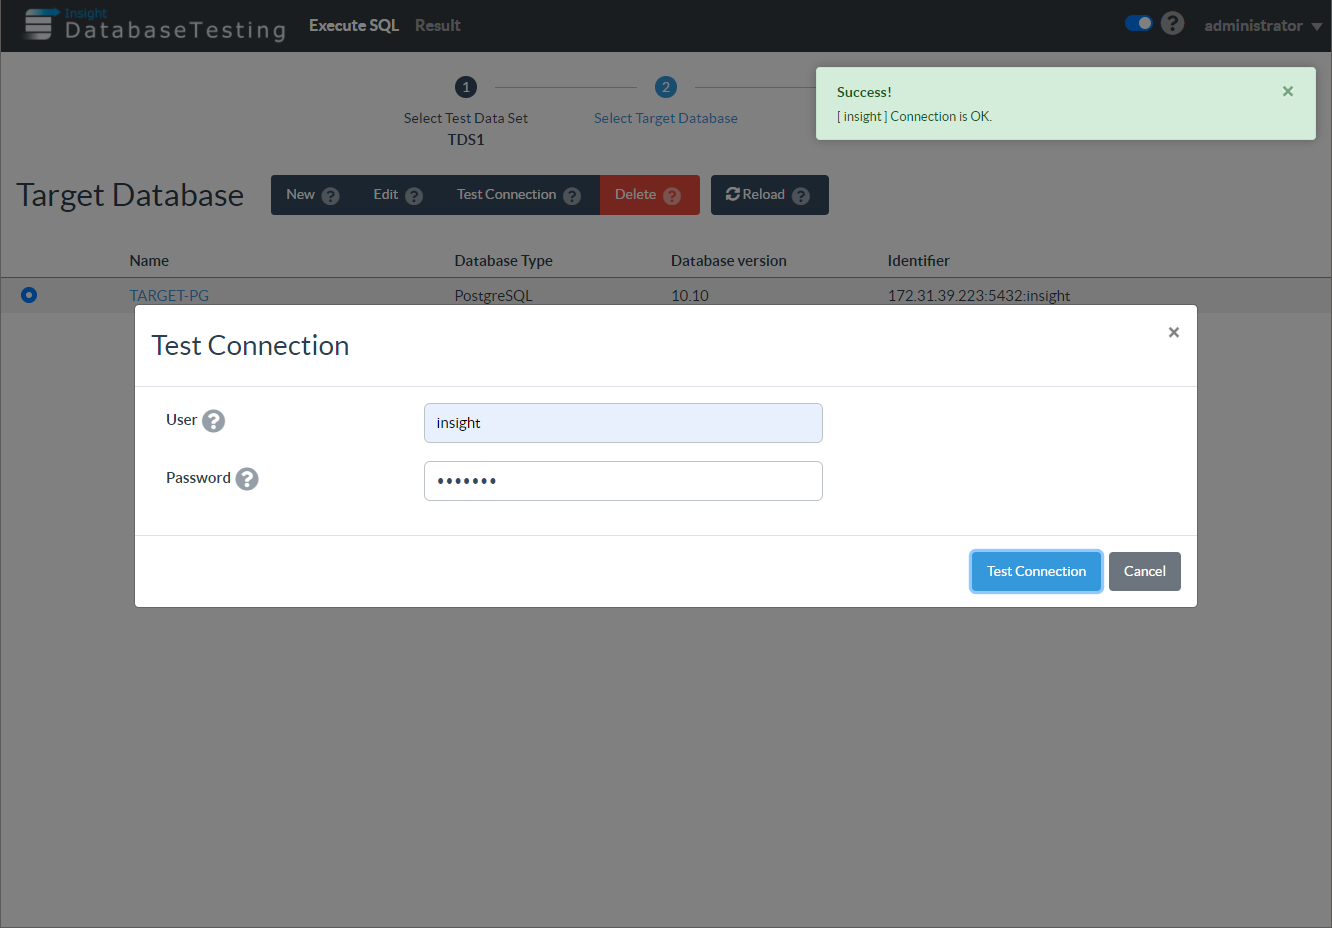
After adding test database, select the database and select [Test Connection].
-
Set user and password for the target database and select [Test Connection] to check the connection.
-
Select created Target Database from the list. (Click the name.)
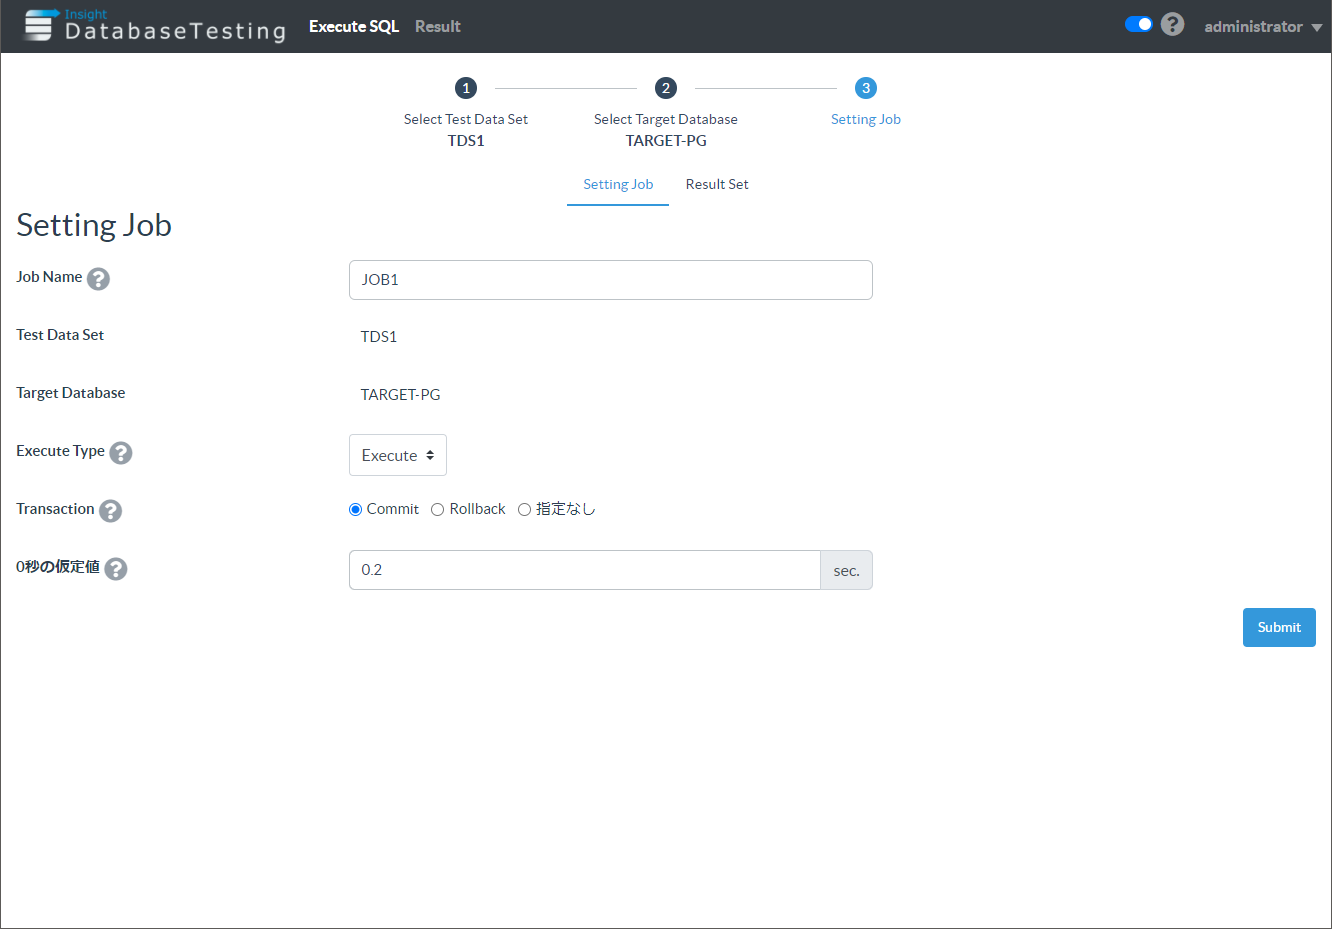
Execute on Target DB
-
Set following info.
-
Job Name: neme of the evaluation result.
-
Execute Type: Execute or Parse
-
Transaction: Commit
-
'0秒の仮定値': 0.2
-
-
Select [Submit].
-
Input the password for database user.
-
Select [Submit].
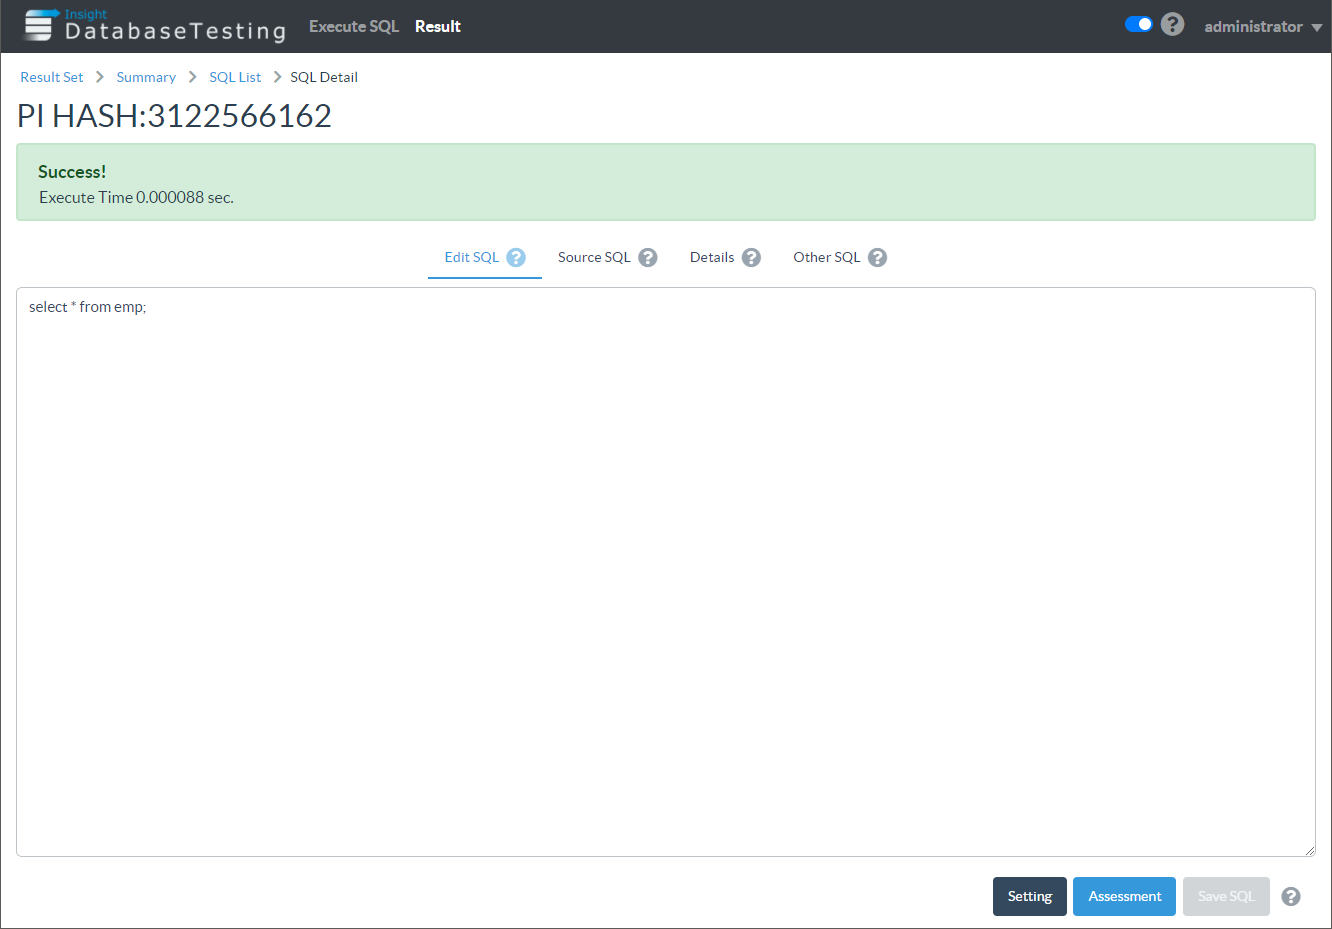
Confirm the result.
-
Select [Result] from the menu.
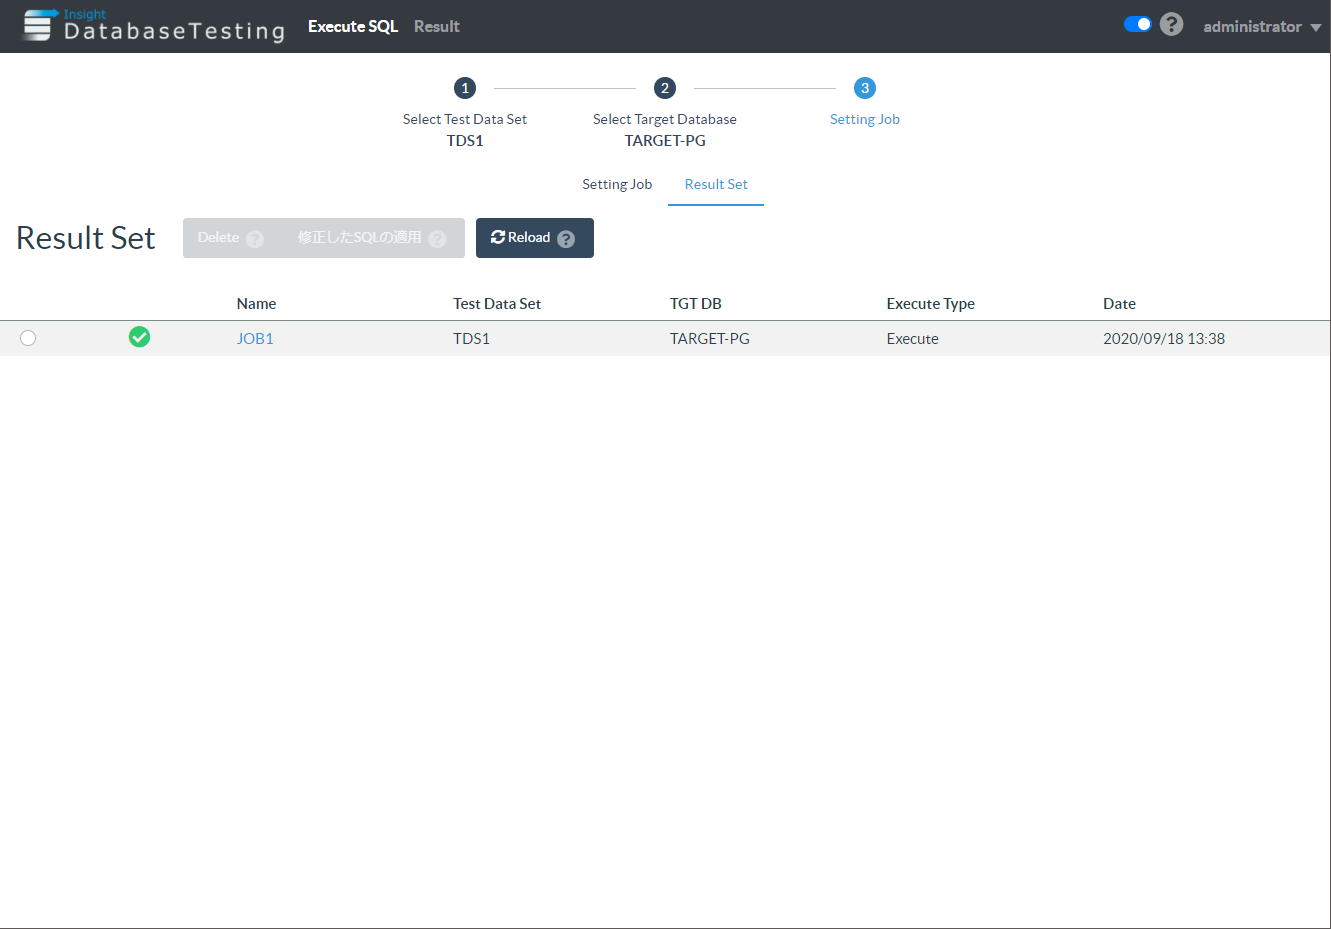
-
Select name of the result.
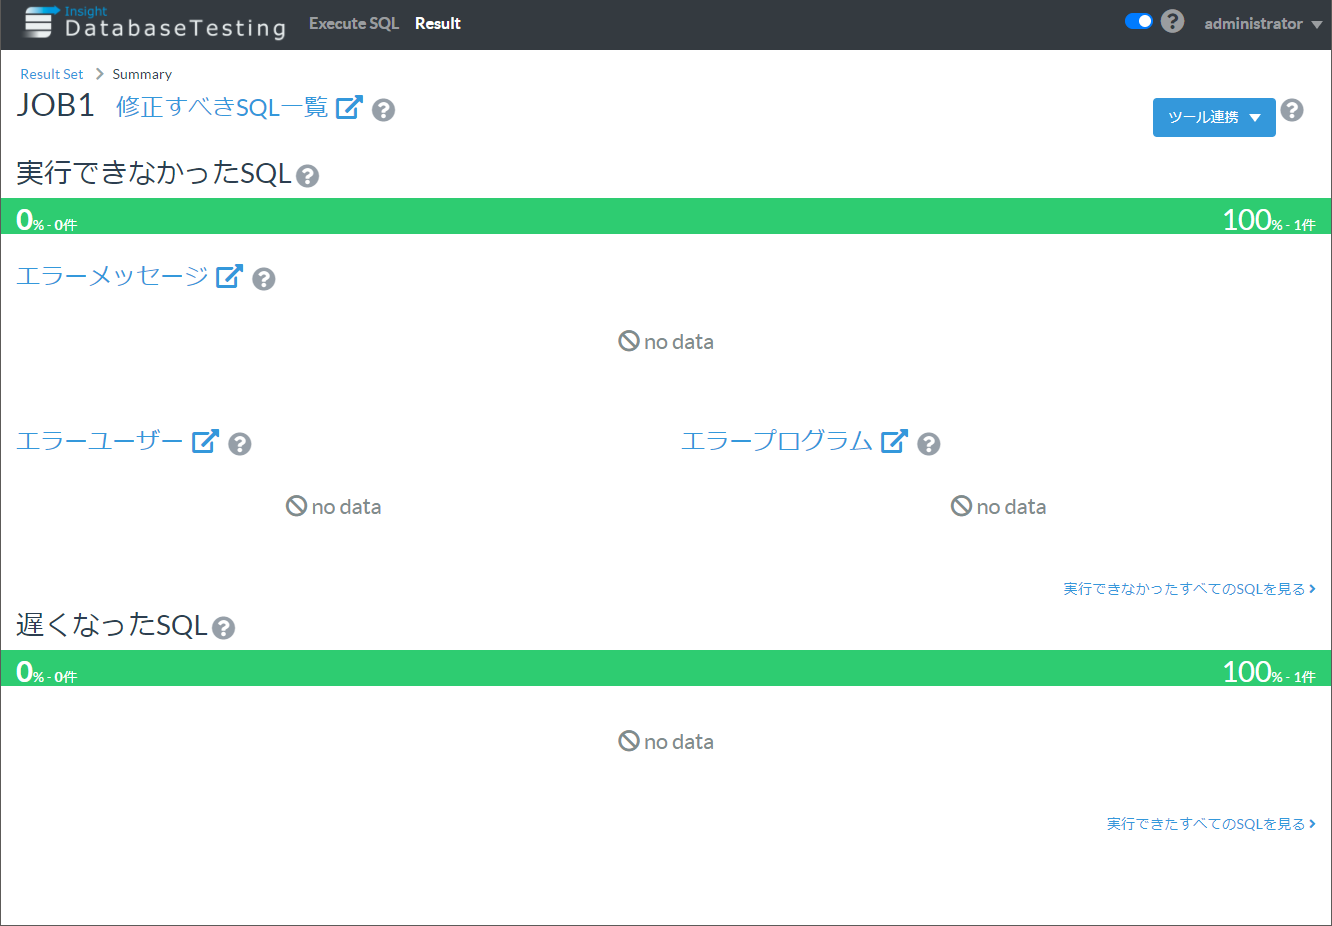
-
Select [実行できたすべてのSQLを見る] at right bottom. (Show all SQLs which are executed successfully.)
-
Select a SQL entry. Following image shows the execution result.